


How to Install a Push-Button Start: A Modern Upgrade for Your Car
Source:https://cdn.shopify.com
Upgrading your car with a push-button start system is one of the most exciting ways to enhance its functionality and modernize its interior. Not only does it provide a sleek, contemporary look, but it also adds a level of convenience and security. A push-button start replaces the traditional ignition key, offering a more streamlined and efficient way to start your vehicle. If you’re looking to add this feature to your car, you may be wondering how to install a push-button start and what’s involved in the process.
In this article, we’ll guide you through the steps necessary to install a push-button start system in your vehicle. Whether you’re looking to install this feature for aesthetic reasons or because you appreciate the increased security and functionality it offers, we’ll provide the details you need to get started. Let’s break down the installation process and review the key elements of this upgrade.
1. Understanding the Benefits of a Push-Button Start System
Before we dive into the installation steps, it’s important to understand the advantages of installing a push-button start in your car. This upgrade offers both functional and aesthetic improvements, making it a popular choice for many car enthusiasts.
Convenience and Efficiency
A push-button start makes starting your car a simple one-step process. Gone are the days of fumbling around with a traditional key, especially in situations where you may have your hands full or are in a hurry. With the push of a button, your car’s engine will start. Many systems even allow you to keep the key fob in your pocket or bag, as long as you’re inside the vehicle, enabling you to start the car without taking the fob out.
Increased Security
A push-button start system often integrates keyless entry and a security chip within the key fob, providing an added layer of protection against theft. Traditional ignition keys are vulnerable to being copied, but the keyless entry system used in most push-button start systems makes it much more difficult for thieves to hotwire the vehicle or bypass the ignition.
A Modern, Sleek Appearance
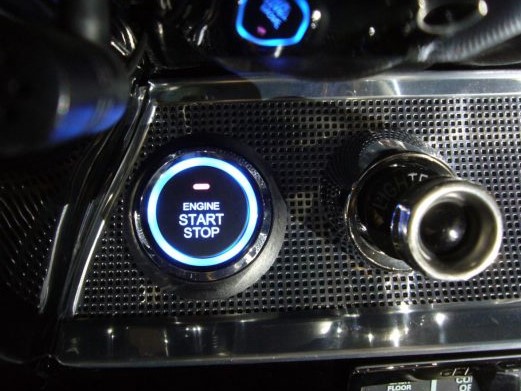
In addition to the functional advantages, a push-button start adds a touch of modernity to your car’s interior. The sleek, futuristic look is often associated with high-end, luxury vehicles. Adding a push-button start to a standard car model can give it a more premium feel and improve its overall aesthetic appeal.
2. Tools and Materials You’ll Need
Before you start, it’s important to gather all the tools and materials necessary for the installation of a push-button start system. The process involves wiring and connecting components, so you’ll need a basic understanding of your car’s electrical system, or assistance from a professional if you’re unsure. Here’s a list of materials and tools you’ll likely need for the job:
Tools:
-
Screwdrivers (Phillips and flathead)
-
Wrenches and socket set
-
Wire strippers and crimpers
-
Electrical tape
-
Multimeter (to check for power connections)
-
Pliers
-
Drill with appropriate bits (for the button mount)
Materials:
-
Push-button start kit (includes push button, wiring harness, relays, and a key fob)
-
Key fob transmitter (for the keyless entry feature)
-
Wiring connectors and electrical tape
-
Mounting brackets (depending on your vehicle)
Once you’ve gathered all the necessary tools and materials, it’s time to begin the installation process.
3. Step-by-Step Guide on How to Install a Push-Button Start
Now that you’re prepared, let’s go through the steps involved in how to install a push-button start in your vehicle. This guide assumes that your vehicle does not already have a push-button start system, and you are retrofitting it to a traditional ignition system.
Step 1: Disconnect the Battery
Before working with any electrical components in your car, safety is paramount. Start by disconnecting the vehicle’s negative battery terminal to avoid electrical shock or accidental short-circuits while working with the car’s wiring.
Step 2: Choose a Location for the Push Button
Next, determine where you’d like to mount the push-button start in your car’s interior. Common locations include near the dashboard, on the center console, or near the gear shift. If your car’s design allows, try to mount it in a position where it is within easy reach but does not interfere with other controls.
Once you’ve chosen the location, you may need to drill a hole (using the appropriate drill bit) to fit the button. Be sure to check for any underlying components, like wiring or airbag systems, to avoid damaging them during installation.
Step 3: Wire the Push Button to the Ignition Circuit
This is the most complex part of the installation process and requires a basic understanding of your vehicle’s wiring system. You’ll need to locate the ignition switch and identify the wires responsible for powering the ignition and accessories.
-
Connect the push-button start wire to the ignition switch and relay circuit.
-
Use wire connectors to ensure solid and secure connections, and wrap them with electrical tape to avoid any loose connections.
-
You’ll also need to connect the power wire from the push-button to the car’s battery circuit to provide the necessary current when the button is pressed.
Ensure you have a solid understanding of your vehicle’s wiring or consult the installation manual of your push-button kit for specific instructions for your car model.
Step 4: Install the Keyless Entry System
Most push-button start kits come with a keyless entry system, which will require installation as well. This typically involves placing a key fob receiver under the dashboard, near the steering column, and linking it with the push-button circuit.
Once the key fob is installed and synchronized with the push-button start system, you should be able to start the car by simply pressing the button while the key fob is inside the car.
Step 5: Test the System
Before reassembling everything and reconnecting the battery, it’s a good idea to test the system. Turn the ignition to the “On” position (without starting the engine) and press the push-button to see if the system responds properly. If everything is connected properly, the car should start with the push of a button.
Step 6: Reassemble and Reconnect the Battery
Once the system is tested and working properly, reassemble any dashboard panels or components you removed to access the ignition wiring. Finally, reconnect the negative battery terminal and give the system another test run to ensure everything functions correctly.
In conclusion, how to install a push-button start in your car is a relatively straightforward process, provided you have the right tools and a basic understanding of automotive electrical systems. This modern upgrade not only adds convenience but also enhances your car’s security and aesthetic appeal. If you follow the steps carefully, you can enjoy the luxury of keyless ignition, which is found in many high-end vehicles, without the need to purchase an entirely new car. Whether you’re upgrading for style, convenience, or security, installing a push-button start is a rewarding and valuable enhancement to your vehicle.